PowerAda Ada95 Demo
This demo illustrates a few of the Ada95 features in PowerAda and their integration into the PowerAda environment. The Ada95 demo implements a heterogeneous linked list. The base list type is defined in the package Doubly_Linked. This package defines the list and the standard operations available on a doubly linked list, including an Image routine to print out elements of the list. Another package, Derived_Nodes, extends the tagged types in Doubly_Linked and overloads the Image routine for these extended types.
The main subprogram, H_List_Demo, builds a doubly linked list of these extended types, traverses the list and calls Image for each of the extended types. Each of the calls to Image is a dispatching operation, meaning that the choice of which Image routine is to be called is determined at runtime.
A child package, Doubly_Linked.Child, is also included. This package adds a few operations to Doubly_Linked, taking advantage of the extra visibility that child packages have.
Protected types, use type clauses and subprogram access types are also demonstrated.
This demo will take about 15 minutes to complete.
You should have already created the temporary demo directory and working project. If you have not, please refer to "Required Setup" in the "Introduction" section.
Contents
Starting Powerada
If you have not already done so, start powerada in the temporary demo directory with the following command:
powerada
In a few seconds, you should see the powerada Navigator window. If the window does not appear, see "Basic Troubleshooting". The powerada Navigator will display the contents of the project root directory.
Building the Program
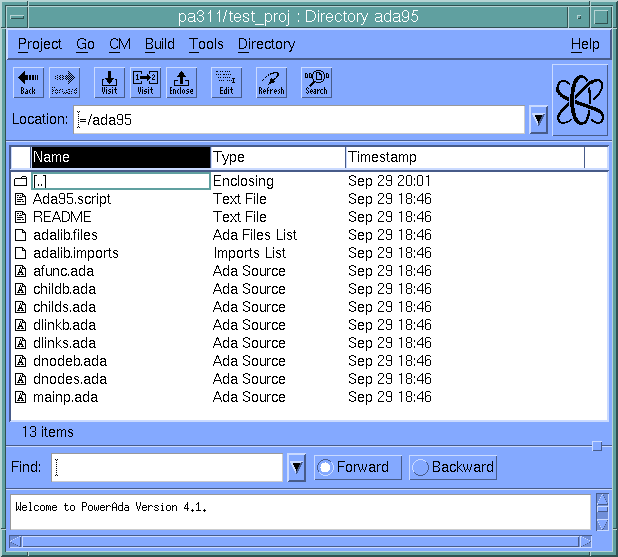
You will be working with a heterogenous list program which is located in the ada95 directory. Navigate to that directory by double-clicking on the ada95 directory entry in the list. The powerada Navigator now displays the contents of the ada95 directory:
To build the program:
- Select
mainp.adafrom the list of files. - Under the Build menu, click Bind Main...
- In the Bind File window that comes up, click the Bind button at the lower left.
The Build Manager will load mainp.ada and the other files named in the adalib.files file, and compile all the units needed to bind the main program. For more information, see "Powerada Build Windows" in Chapter 4).Click the Dismiss button when the job completes.
Copying the Debugger Script File
The demo also needs a local version of the file Ada95.script, which contains debugger commands. To copy that locally:
- Select
Ada95.scriptfrom the list of files in theada95directory; - Under the Directory menu, click Copy File(s)...;
- In the text field of the Copy dialog, type "." (a single period) as the destination directory, and hit Enter (or click Ok).
The filename should now be shown in bold, indicating it's in your local project.
Looking at Ada95 Features
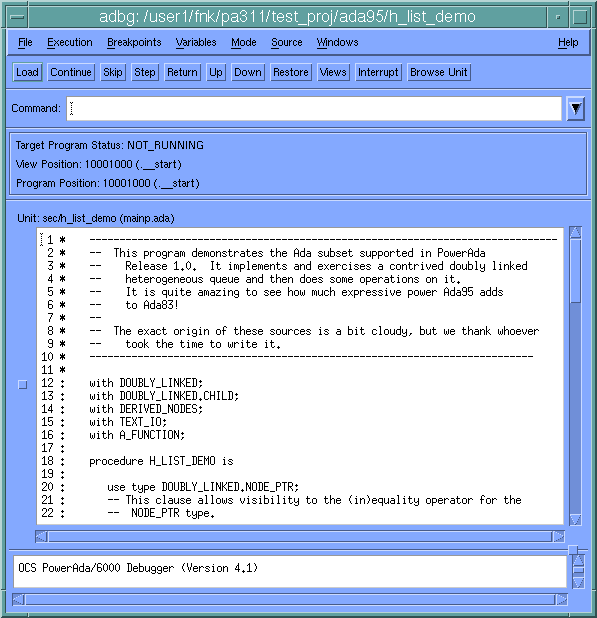
You will now examine the program in the debugger, adbg, which is a separate program from powerada. Click on the executable we just built, h_list_demo, and choose Debug Program from the Directory menu, then click Debug when this dialog appears. After the debugger main window appears, click on the Load button in the Load Target Program dialog. The debugger will load the program and display the source code for the main subprogram:
For more on the debugger, see the Edit-Compile-Debug Demo, or Chapter 6, "The PowerAda Debugger: adbg".
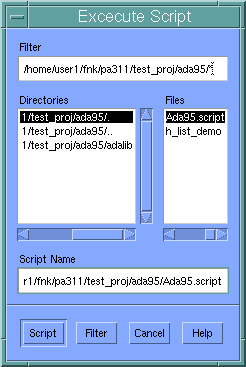
Note at line 20 the use type clause. In Ada83, this would have been implemented as a number of function renamings. In Ada95, a use type clause establishes direct visibility to the specified type. Choose Execute Script... from the File menu and select the script file Ada95.script in the righthand column of the file selection dialog. (If it doesn't appear, perhaps you didn't copy it locally as described in "Copying the Debugger Script File" above; do that now.) The debugger will run the script to set some breakpoints in the program.
Start the program by clicking the Continue button at the top of the main window. The program will stop at the first breakpoint. At this point the program is setting the field of one of the extended queue elements to be the access value of a subprogram. Note that any subprogram with the same parameter profile could be "queued". Using subprogram access types, one can pass subprograms as parameters, place them in data structures and call them dynamically.
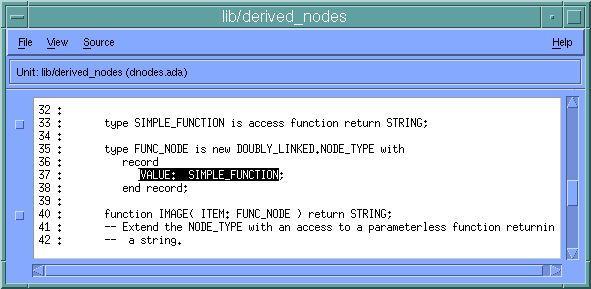
To see the declaration of a subprogram access, middle-click on Value on that line, and then right-click to activate the pop-up menu, In this menu, choose Definition Of (or use the accelerators Control-D or Control-V). This will pull up a browser highlighting the Value component of the type FUNC_NODE. Do Definition Of again (or use the accelerators Control-D or Control-V) to see the declaration of a subprogram access type.
Close this browser window, return to the main debugger window, and click the Continue button. The program now stops in the body of the protected type Ticket_Master. Some of the queue elements have tasks in them and in this demo each task requests a ticket, which is just an incremented integer. The protected type "protects" the ticket against simultaneous updates. At this point, click the Views button and you will see two tasks, where worker is at line 81 inside the protected body. In Ada83, such protection would have required a third task.
Click the Continue button and wait for the next breakpoint. At this point, the program is in the child package Doubly_Linked.Child in the subprogram Is_Head. Do a Visit operation on Item.Base.Head (middle-click on Is_Head, then type Control-V) and notice that its definition is in the private part of Doubly_Linked. Doubly_Linked is a separate package from Doubly_Linked.Child, but since Doubly_Linked.Child is a child package, it has visibility to the private part of Doubly_Linked.
Close this browser window, return to the main debugger window, and click Continue. The program is now at the Image call, which is dispatching. Select List_Element.all (middle-click on all) and click the right button on the mouse. From the popup menu, choose ?<>. The value of List_Element.all is displayed as the ancestor type followed by the extended part (it is an access type so Value shows a pointer). The components Prev, Next, and Base are common to all list elements. The Value component is an extension which is different for each type. In this case, since Value is a pointer, you can type ? List_Element.Value.all to show the what it is pointing to.
Click Step. Note that the program is at the Task_Node image. (The task node extended part is actually an access to a task.)
Click Continue. Query the value of List_Element.all and notice that the extended part is now different (it is still a pointer, but this time to a function not to a task).
Click Step. Notice that a different subprogram was called. This is quite different from Ada83. This subprogram call is resolved dynamically. This one is the function extended type. This is not like variant records; these are extended types, the fundamental building block of all object-oriented programing. Note also how the subprogram access is called, by dereferencing it with the .all selector.
Click Continue. Query the value of List_Element.all and notice that it is yet a third extended type: integer. Step and see yet a third subprogram dispatched for the same call site.
Click Continue. Query the value of List_Element.all, and we see a float extended type. Step and see a fourth subprogram dispatched.
Click Continue and the program terminates.
This concludes the Ada95 demo. Choose Quit from the adbg File menu to close the debugger windows.


